You don’t need thousands of dollars to set up a YouTube studio on a budget that looks and sounds professional. Most successful creators started with a basic setup and upgraded over time. What matters more than having the best gear is understanding what each piece does and spending your budget where it actually makes a difference.
We’ve helped hundreds of readers find the right creator gear through our microphone, lighting, and tripod roundups. This guide takes all of that knowledge and puts it in one place: a step-by-step plan for building your budget YouTube studio for under $500.
What You’ll Need: Quick Overview
Before we dive into each component, here’s what a complete YouTube studio setup includes. We’ll cover each one in detail below, ranked by how much impact it has on your video quality.
- Audio (Microphone) — The single biggest quality upgrade
- Lighting — The fastest way to look professional
- Camera Stabilization (Tripod) — Stop the shaky video
- Background Setup — What’s behind you matters
- Editing Software — Where your content comes together
- Camera — You probably already own one
Step 1: Start with Audio (This Is Not Negotiable)

Here’s the single most important thing to know about YouTube: viewers will tolerate mediocre video, but they will click away from bad audio in seconds. This is backed by research and confirmed by every successful creator we’ve spoken to. Your microphone is the first thing you should buy, not your camera.
For most beginners setting up a YouTube studio on a budget, a USB condenser microphone is the right call. It plugs directly into your computer, requires no extra equipment like an audio interface, and delivers studio-quality sound for a fraction of what professional setups cost.
What to Look for in a Budget YouTube Microphone
- USB connection (no need for an audio interface when starting out)
- Cardioid pickup pattern (captures your voice, rejects background noise)
- Built-in gain control (lets you adjust sensitivity without software)
- Desktop stand included (one less thing to buy)
Pro tip: Place your microphone 6-8 inches from your mouth, slightly off to the side to avoid plosive sounds (those harsh “p” and “b” pops). This one adjustment makes a bigger difference than upgrading to a more expensive mic.
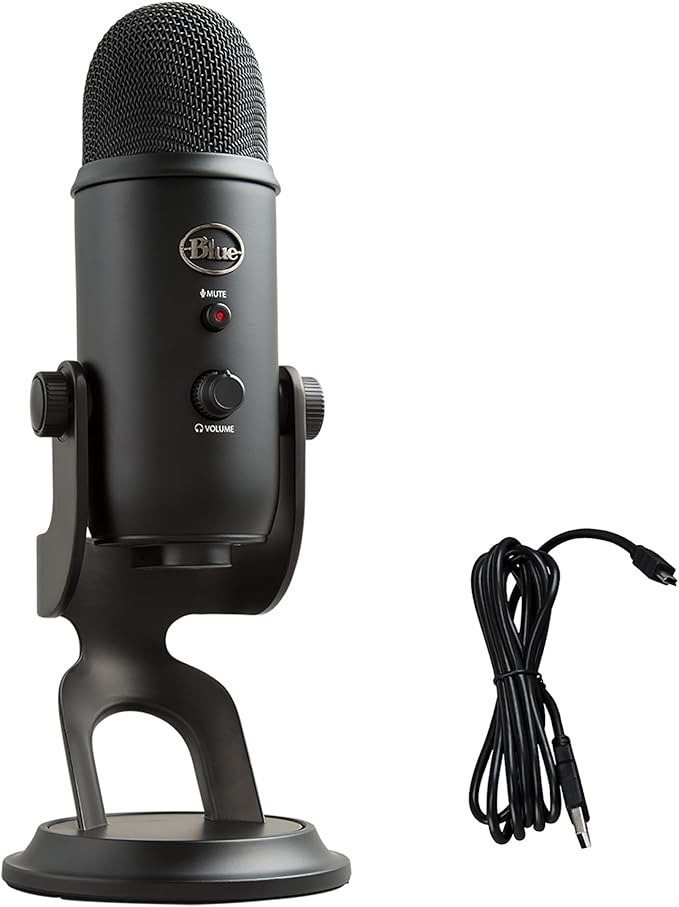
Budget range: $50-130 for a quality USB microphone. The sweet spot for beginners is around $100, which gets you something like the Blue Yeti or Audio-Technica AT2020USB+.
Read Our Full Microphone Roundup →
Step 2: Lighting (The Fastest Way to Look Professional)

Bad lighting makes even a 4K camera look terrible. Good lighting makes even a basic webcam look decent. Lighting is the single biggest visual upgrade you can make to your YouTube studio, and it doesn’t have to cost much.
There are three types of lighting setups for YouTube creators, and the right one depends on your space and content type.
Option A: Ring Light ($25-60)
Best for talking-head videos, tutorials, and vlogs. A ring light sits directly in front of you, creates even lighting across your face, and eliminates shadows. The downside is that distinctive ring-shaped catchlight in your eyes that screams “YouTuber.” For some people that’s fine, for others it feels unprofessional.
Option B: LED Panel Lights ($60-200)
Best for a more natural, professional look. A single LED panel placed at a 45-degree angle to your face creates soft, directional light that looks like natural window light. Two panels (a key light and a fill light) give you even more control. This is what most mid-level creators use, and it’s the setup we recommend for most people.
Option C: Natural Light ($0)
Best for vloggers and anyone with a window. Sit facing a large window with indirect sunlight. This is legitimately the best lighting you can get, and it’s free. The catch is that it’s inconsistent. Cloudy days, evening shoots, and room orientation all affect it. Great as a primary source with a small LED fill light as backup.
Common mistake: Putting a light source behind you. This creates a silhouette effect and makes your face dark. Your primary light should always be in front of you or at a 45-degree angle.
Budget range: $0 (natural light) to $200 (professional LED panel setup). We recommend spending $60-100 on a single quality LED panel to start.
Read Our Full Lighting Roundup →
Step 3: Camera Stabilization (Stop the Shaky Video)

If you’re using a phone, webcam, or mirrorless camera, you need something to hold it steady. Handheld video has its place (B-roll, vlogs on the go), but your main talking-head setup needs a stable mount.
The good news is that camera stabilization is the cheapest part of your YouTube studio setup.
For Desk Setups (Talking Head, Tutorials)
A small desktop tripod or flexible tripod like the Joby GorillaPod is all you need. Flexible tripods wrap around shelves, mount on desk edges, and adjust to any angle. For phone users, get a tripod with a phone mount adapter (most come with one).
For Standing Setups (Full Body, Presentations)
A full-size tripod with adjustable height. Look for one with a fluid head if you plan to do any panning. Budget models work fine for stationary shooting.
For Vlogging and On-the-Go Content
A handheld gimbal or a compact gorilla pod that doubles as a handle. If you’re walking and talking, a gimbal is the best investment you’ll make. But if you’re mostly doing stationary video with occasional movement, a flexible tripod with a good phone grip does the job.
Pro tip: Your camera height matters more than you think. Position your camera at eye level or slightly above. Below eye level creates an unflattering “looking up your nose” angle that makes even professional setups look amateur.
Budget range: $20-80 for a solid tripod setup. A quality flexible tripod runs $25-55 and covers most beginner needs.
Read Our Full Tripod Roundup →
Step 4: Your Background (What’s Behind You Matters)

Your background tells viewers a lot about you before you say a word. A messy room says “I didn’t prepare.” A blank wall says “I’m boring.” A curated background says “I’m intentional about what I create.”
You don’t need a dedicated studio room. You need one corner of one room that looks good on camera.
The Free Approach: Clean and Curate What You Have
Clear everything out of the frame that isn’t intentional. Then add back only what creates visual interest: a bookshelf with some gaps between items, a plant, a simple piece of art, or warm-toned lamp. Less is more. Scan your background through your camera and remove anything distracting.
The $30-50 Approach: Add Depth and Texture
A floating shelf or two behind you with a few curated items (a small plant, a candle, a book standing upright) creates the layered look you see on professional channels. LED strip lights ($15-20) behind your desk or shelves add a subtle glow that separates you from the background and looks fantastic on camera.
The Portable Approach: Collapsible Backdrop
If you’re in a space that just doesn’t work (roommates, shared spaces, windows you can’t control), a collapsible backdrop ($30-80) eliminates the problem entirely. Solid colors (gray, dark blue) or simple textured backgrounds work best.
Common mistake: Over-decorating your background. If your background is more interesting than you, viewers will look at it instead of listening to you. Keep it simple, clean, and slightly blurred if your camera supports it.
Step 5: Video Editing Software (Free Options That Actually Work)
Your editing software matters, but not as much as you think when you’re starting out. The best editing software is the one you’ll actually learn and use consistently.
Free Options (Genuinely Good)
DaVinci Resolve (Free) is the industry standard free editor. It’s what we recommend for most beginners. It handles 4K footage, has professional color grading tools, and does everything iMovie or basic Premiere can do. The learning curve is steeper than iMovie but gentler than full Premiere Pro. It runs on Mac, Windows, and Linux.
CapCut (Free) is the fastest option for short-form content. If you’re making YouTube Shorts, Reels, or TikToks, CapCut’s template system and auto-caption feature will save you hours. Not ideal for long-form content but unbeatable for quick edits.
Paid Options (When You’re Ready)
Adobe Premiere Pro ($23/month) is the industry standard and what most full-time creators use. Worth it once you’re posting consistently and need advanced features.
Final Cut Pro ($300 one-time) is the best option for Mac users who want pro features without a subscription.
Pro tip: Start with DaVinci Resolve. Learn it for 2-3 months. If you hit a wall where it genuinely can’t do something you need, then upgrade. Most beginners never hit that wall.
Budget range: $0 (DaVinci Resolve) to $300 (Final Cut Pro one-time). For most beginners, $0 is the right answer.
Need a Laptop for Editing? See Our Top Picks →
Step 6: Your Camera (You Probably Already Own One)
This might be controversial, but here it is: do not buy a new camera when you’re starting out. Your smartphone camera is good enough. Every iPhone from the 12 onward and every flagship Android from the last 3 years shoots better video than the cameras most successful YouTubers started with.
The reason your phone footage doesn’t look “professional” yet isn’t the camera. It’s the lighting, the audio, and the stabilization. Fix those first (Steps 1-3 above), and your phone footage will look dramatically better.
When to Upgrade to a Dedicated Camera
Upgrade when you’ve been posting consistently for 3-6 months and you’ve identified a specific limitation your phone can’t solve. Common reasons to upgrade: you need better low-light performance, you want shallow depth of field (the blurry background look), you need longer recording times, or you need to shoot while using your phone for other things.
If You Do Want a Dedicated Camera
A mirrorless camera in the $500-800 range (like the Sony ZV-E10 II) will cover everything a YouTube creator needs for years. But again, only after you’ve confirmed that your phone is actually holding you back.
The trap to avoid: Buying an expensive camera before you’ve figured out your content. The number of $1,000+ cameras collecting dust on shelves because someone bought gear before they built a habit of creating is staggering. Start with your phone. Post 10 videos. Then decide if you need more camera.
Complete YouTube Studio Budget Breakdown (2026 Prices)
Here’s what a solid beginner YouTube studio costs in 2026, broken into three tiers based on current Amazon pricing from our tested recommendations.
Starter Setup (Under $150)
| Item | Option | Cost |
|---|---|---|
| Microphone | Fifine USB condenser mic | $30-40 |
| Lighting | Natural light + $15 LED fill | $15 |
| Tripod/Mount | Basic phone tripod | $15-20 |
| Camera | Your smartphone | $0 |
| Editing | DaVinci Resolve (free) | $0 |
| Background | Clean up existing space | $0 |
| Total | $60-75 |
Recommended Setup (Under $350)
| Item | Option | Cost |
|---|---|---|
| Microphone | Blue Yeti or Audio-Technica AT2020USB+ | $90-130 |
| Lighting | LED panel (Neewer or Elgato Key Light Air) | $60-100 |
| Tripod/Mount | Joby GorillaPod 3K Kit | $30-55 |
| Camera | Your smartphone | $0 |
| Editing | DaVinci Resolve (free) | $0 |
| Background | Floating shelf + LED strip + plant | $30-50 |
| Total | $210-335 |
Pro-Quality Setup (Under $500)
| Item | Option | Cost |
|---|---|---|
| Microphone | Blue Yeti + pop filter + boom arm | $130-160 |
| Lighting | Elgato Key Light (main) + LED strip | $130-180 |
| Tripod/Mount | Joby GorillaPod 3K Pro + phone adapter | $50-75 |
| Camera | Your smartphone | $0 |
| Editing | DaVinci Resolve (free) | $0 |
| Background | Curated shelf setup + accent lighting | $40-60 |
| Total | $350-475 |
What to Buy First (Priority Order)
If you can’t buy everything at once, here’s the order that gives you the biggest impact per dollar spent:
- Microphone — Bad audio is the #1 reason new viewers click away. Buy this first, even if you buy nothing else.
- Lighting — A $60 LED panel makes a bigger difference than a $600 camera upgrade.
- Tripod/Mount — Stops shaky video and lets you frame your shot properly. Cheap and essential.
- Background — A few intentional items behind you elevate the whole look. Can be done for under $50.
- Camera (eventually) — Only after 6-12 months of consistent posting when you’ve identified what your phone can’t do.
The real secret: The creators with 100K+ subscribers didn’t start with perfect gear. They started with good-enough gear and consistent posting. The algorithm doesn’t care what microphone you use. It cares whether people watch your videos to the end. Focus on content quality and consistency first, gear second.
Your 7-Day Quick-Start Checklist
Do one item per day, and you’ll be ready to record your first video within a week.
- ✅ Day 1: Clean your recording space. Remove clutter from the frame.
- ✅ Day 2: Find your best natural light source (usually a window). Note what time of day it looks best.
- ✅ Day 3: Order a USB microphone.
- ✅ Day 4: Download DaVinci Resolve. Watch one 20-minute beginner tutorial.
- ✅ Day 5: Set up your phone or camera on a tripod at eye level.
- ✅ Day 6: Record a 2-minute test video. Watch it back. Adjust mic placement, lighting angle, and camera height.
- ✅ Day 7: Record your first real video. It won’t be perfect. Ship it anyway.
Frequently Asked Questions
How much does it cost to set up a YouTube studio?
A basic YouTube studio setup costs between $60 and $500, depending on what you already own. Most beginners can get started for under $150 using their smartphone as a camera, a USB microphone ($30-130), a basic tripod ($15-55), and free editing software like DaVinci Resolve. You don’t need to spend thousands to make professional-looking videos.
Do I need a special camera for YouTube?
No. Your smartphone is more than good enough to start. Any iPhone from the 12 onward or recent flagship Android shoots video that’s better than what most successful YouTubers started with. The biggest improvements to your video quality come from better lighting and audio, not a better camera. Upgrade to a dedicated camera only after 3-6 months of consistent posting.
What’s the most important piece of YouTube equipment?
A quality microphone. Viewers will tolerate mediocre video but will click away from bad audio in seconds. A USB condenser microphone in the $50-130 range (like the Blue Yeti) is the single best investment you can make for your YouTube channel.
Can I start a YouTube channel with no money?
Yes. Use your smartphone camera, natural window light, prop your phone against some books for stability, and edit with free software like DaVinci Resolve or CapCut. The only real investment is your time. Many successful creators started exactly this way. Once your channel gains traction, reinvest into better audio equipment first.
What free video editing software should I use for YouTube?
DaVinci Resolve is the best free video editor for YouTube creators in 2026. It handles 4K footage, includes professional color grading, and runs on Mac, Windows, and Linux. For short-form content (YouTube Shorts, Reels), CapCut is a great free alternative with fast auto-captioning.
Related Reviews from The Review Roundup
- Best Microphones for YouTube Beginners — Our #1 pick and 7 alternatives tested
- Best Lighting for YouTube Creators — Ring lights vs. panels vs. natural light
- Best Tripods and Camera Mounts — Flexible, desktop, and full-size options compared
- Best Laptops for Video Editing — What specs actually matter for editing 4K
- Best Ergonomic Office Chairs — If you’re editing for hours, your chair matters
Frequently Asked Questions
How much does it cost to set up a YouTube studio on a budget?
A solid beginner YouTube studio can be set up for $200–$500. A used DSLR or mirrorless camera ($150–250), a basic ring light or LED panel ($40–80), and a USB microphone ($50–100) cover the essentials. You can start shooting quality content without any of the expensive gear you see in big creator setups.
What gear do I actually need to start a YouTube channel?
The bare minimum is a camera (even a recent smartphone works), decent lighting (natural window light or a $40 ring light), and a microphone separate from your camera. Good audio matters more than video quality — viewers will tolerate average video but will click away immediately for bad sound.
What’s the best budget camera for a YouTube studio in 2026?
The Sony ZV-E10 II is the top pick for budget-conscious creators — excellent autofocus, 4K video, and a flip screen for solo shooting, all for under $500. If you want to start even cheaper, a recent iPhone or Android flagship shoots better video than entry DSLRs from five years ago.
Do I need to soundproof my YouTube studio?
You don’t need professional soundproofing. Soft furnishings — rugs, curtains, bookshelves with books, and a couch — naturally absorb echo. The biggest improvement comes from a quality close-mic microphone that picks up your voice and rejects room noise.